Upgrading an on-board air system
David Coxon recently upgraded the on-board air system in his Toyota Prado. Here he outlines what he did and why?
When I swapped out my 12V compressor for one that was much bigger in both size and capacity it was a pleasure to be able to inflate my Prado’s tyres more rapidly. However, the compressor was too big to fit in the slide-out drawers and too heavy to haul out of any available storage space. Time to bite the bullet and start a new project to build a full on-board air system.
Start With a Plan
My first job was to decide what features I wanted.
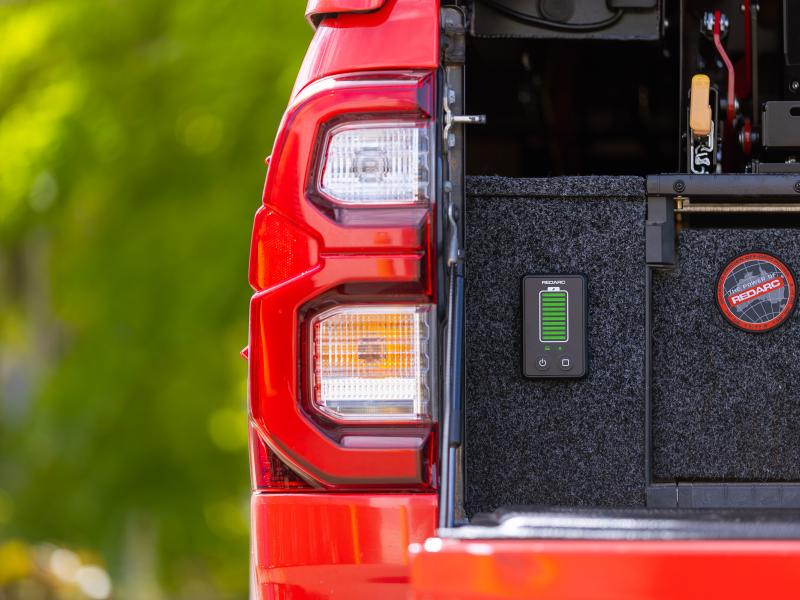
Initially I planned to just mount the compressor in the space beside the rear drawers and run a heavy-duty cable from the battery. Unfortunately, while this worked, the voltage drop was such that it added about a minute to the inflation time – a little disappointing. The solution was to use a tank to provide an air reservoir. This meant that I also needed a pressure switch and a valve to cut off the air from the tank as I moved between wheels - this was getting more complex.
Having decided on fitting a tank, I wanted everything mounted inside the vehicle, to keep the compressor protected from the elements and to avoid air hoses running through the floor to an under-body tank. To avoid clutter, I also wanted everything built into the existing spaces. Finally I needed to be able to fairly easily bypass the air tank and inflate directly off the compressor if the system sprung a leak.
The Tanks
My first task was to source a tank. The amount of room I had dictated a tank that was smaller than I wanted, so I decided to go with two retired but safe fire extinguishers. One fitted in the space down the side of the drawers with the compressor, but there was nowhere to permanently fit the second one. As a compromise I decided that the system needed to work with one tank, for normal 'flat tyre' inflation duties, and I would add the second tank for off road trips. Since I have the rear seat folded down to fit the high lift jack when off roading, the back of the drawers was the ideal place to hang the second tank.
To adapt each tank for its new use, I first removed the handle and valve mechanisms from the tank (making sure it was empty first) then unscrewed the hose. I drilled and tapped the hole from the valve mechanism and sealed it with an eight mm bolt, using plumbers tape to get a good seal. The threaded fitting where the hose had been screwed was fitted with an Aro hose connector.
To mount the permanent tank I fitted a half-length false floor above the wheel arch in the space beside the drawers on the driver's side. I fastened this to the mounting points for the now-retired third row of seats, giving me a solid mounting base for a tank. I used a couple of pieces of timber to provide a cradle for the tank and two steel straps to hold it down.
For the second tank, I made a framework of 25mm x 3mm steel bars and straps to hold the tank. A couple of short lengths of bar were added to hang the tank to the brackets on the back of the drawers. I made the brackets from the same bar and bolted them to the back of the drawers with screw-in ‘nutserts’. I kept the brackets slim enough not affect having the seat back up for daily use.
The Compressor
Keeping the false floor to the length needed for the tank and hose fittings meant that I could mount the compressor vertically at the end of the tank. I made a plate with a bracket that fitted the same mounting point that I used for the false floor and bolted the compressor to the plate replacing the lightweight bolts holding the rubber feet with stronger and longer bolts so that the compressor was isolated from the mounting plate by its rubber feet.
The Air Connections
After drawing up a plan of what I wanted, I did a trip to a local supplier to get a length of hose to connect everything, along with all the NZ standard Aro fittings and adaptors for the variety of threads and hoses I had to deal with.
Back home the first job was to mount the 4-way hose connector and pressure switch on the false floor. I mounted the pressure switch through the false floor so that the electrical connections were accessible from the underside of the floor, where all the electrical wiring would be hidden. Everything was then connected and clamped with quality hose clamps ready to connect to the air tanks and the compressor.
Finally I had to make a couple of changes to the air hose that came with the compressor. Firstly it was fitted with an Australian Nitto connector that is not so easy to get in NZ. Rather than trying to get another non-standard fitting to connect the tanks into the compressor, I cut the compressor hose, fitting Aro connectors to the cut ends to give options to either run the compressor into the tank and connect the rest of the original hose to the outlet from the tanks, or just connect the two sections of hose and bypass the tanks.
Because the original fitting that screwed into the tyre valve had no need to be closed off I also fitted a valve to turn off the airflow while moving between wheels so the compressor would keep topping up the tanks.
Wiring
The final step was the wiring. I ran a separate power supply from the battery, using a six sq. mm wire, through a relay to the compressor power. This was fused with a 50A glass fuse of the type used for car audio systems. The compressor was earthed to the chassis through the mounting bolt. I had previously run a couple of extra earth straps to ensure a good earth between the body and the battery.
I also ran a wire from an existing point that is linked to the ignition to the pressure switch then on to the field terminal of the relay. The field was also earthed to the chassis. This meant that the relay would only turn on and complete the power circuit when the engine was running. In addition of course the compressor itself needed to be switched on before it would work. As an extra safety, the 12V ignition point was itself switchable so that I could turn the compressor (and the other power circuits it drives) off from the dashboard if there was a problem.
Testing
With everything wired up and plugged in, I turned the compressor on - and it worked! As it built up pressure towards the 130psi shut-off I found a few small leaks, mainly in the connections to the hose that came with the compressor, but a bigger screwdriver fixed those.
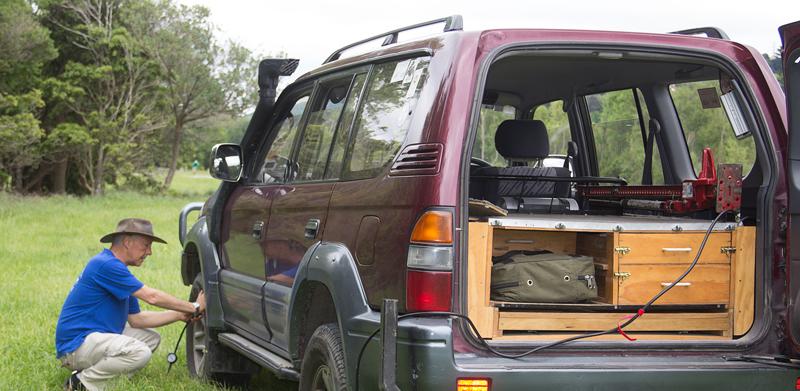
The final step was to do some test fills using the real-world scenario of plugging the hose in and doing all four tyres. The chart shows the timings for the four options.
Overall a highly successful build, and one that I will enjoy using every time I do a trip.
|
Scenario |
Time |
Comment |
|
Baseline (compressor direct to Battery) |
8:40 |
incl 1:15 setting up the compressor |
|
Mounted Compressor - no tanks |
8:30 |
slower per tyre but saved setup time |
|
Mounted Compressor - one tank |
6:20 |
the tank refilled before I started the next tyre |
|
Mounted Compressor - two tanks |
5:40 |
the tanks did not quite refill between tyres |
To read every story in the December 2017 issue of NZ4WD go to Zinio.com (Nov 17) or purchase your own hard copy at the Adrenalin store.